
Intro
I got the idea to do this in April of 2020, after realizing my son (48 at the time) would be 50 in 2022. What could I get him for this momentous birthday? Give him $10,000 cash? Trip around the world? Nah..too ordinary.
Thursday, March 10, 2022
I made a hockey rink for my kids in the two home locations we lived at. This model represents the second rink.I got the idea to do this in April of 2020, after realizing my son (48 at the time) would be 50 in 2022. What could I get him for this momentous birthday? Give him $10,000 cash? Trip around the world? Nah..too ordinary.
Send Comments
And so we begin
Thursday, March 10, 2022
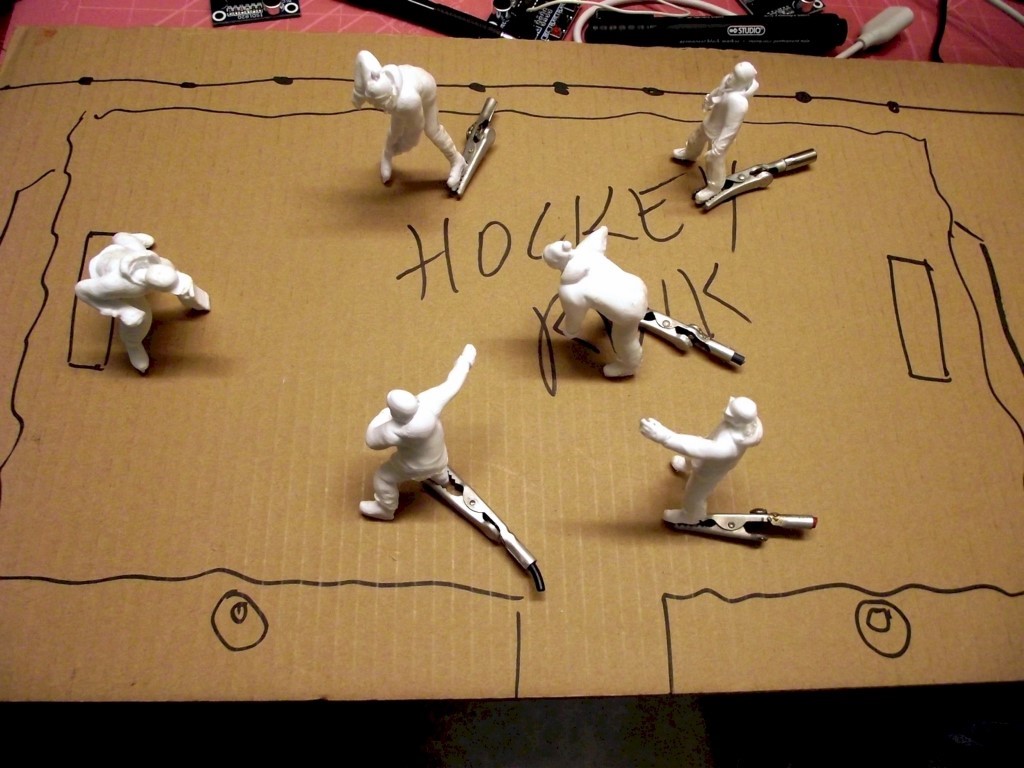
The only thing I got correct immediately was the SIZE of the rink. The photo shows a piece of cardboard with rough drawing of the rink, the snowbanks and the corral. The models were put on much later. I used old photos and did some web research for “pond hockey” to get inspiration and some ideas. uld indicate.
Models
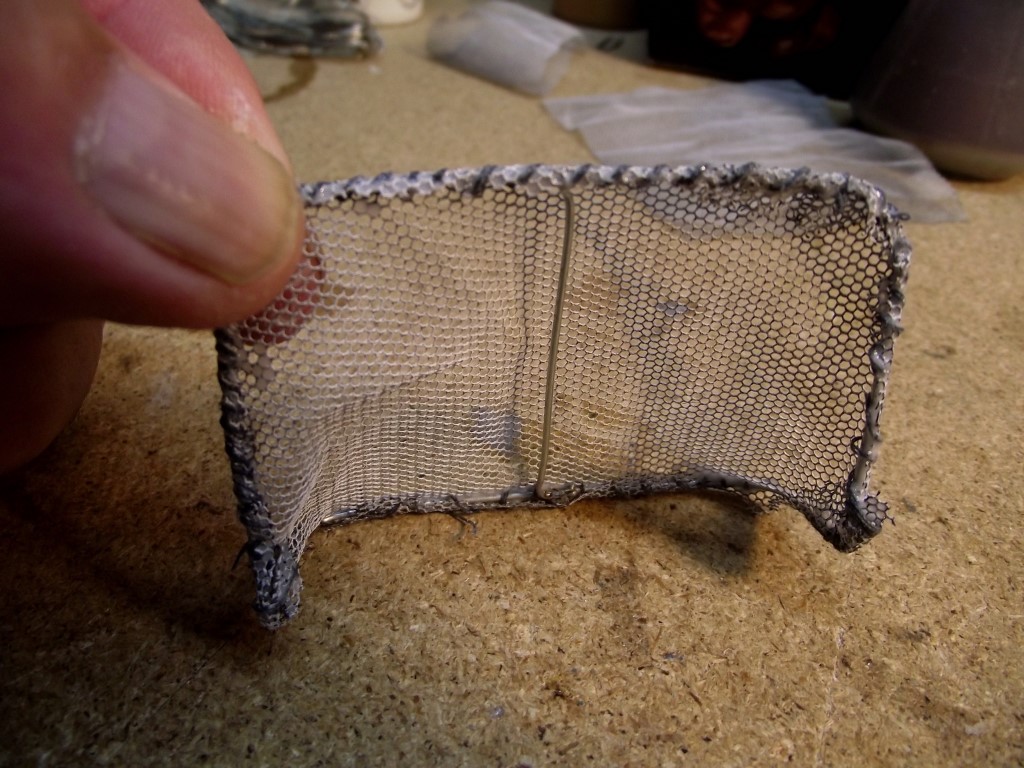
I didn’t like the nets he made because they were too fragile and flimsy at that scale when printed, so I made them out of wire whose ends I soldered, covered with fibreglass screen material , then sewed and glued it onto the frame.
Thursday, March 10, 2022
Software Models I had the player models designed by a guy in Montreal who I found via a Google search on the Internet. He drew the models to my specs in 3D which I then printed out on my 3D printer.I didn’t like the nets he made because they were too fragile and flimsy at that scale when printed, so I made them out of wire whose ends I soldered, covered with fibreglass screen material , then sewed and glued it onto the frame.
Lights
Thursday, March 10, 2022
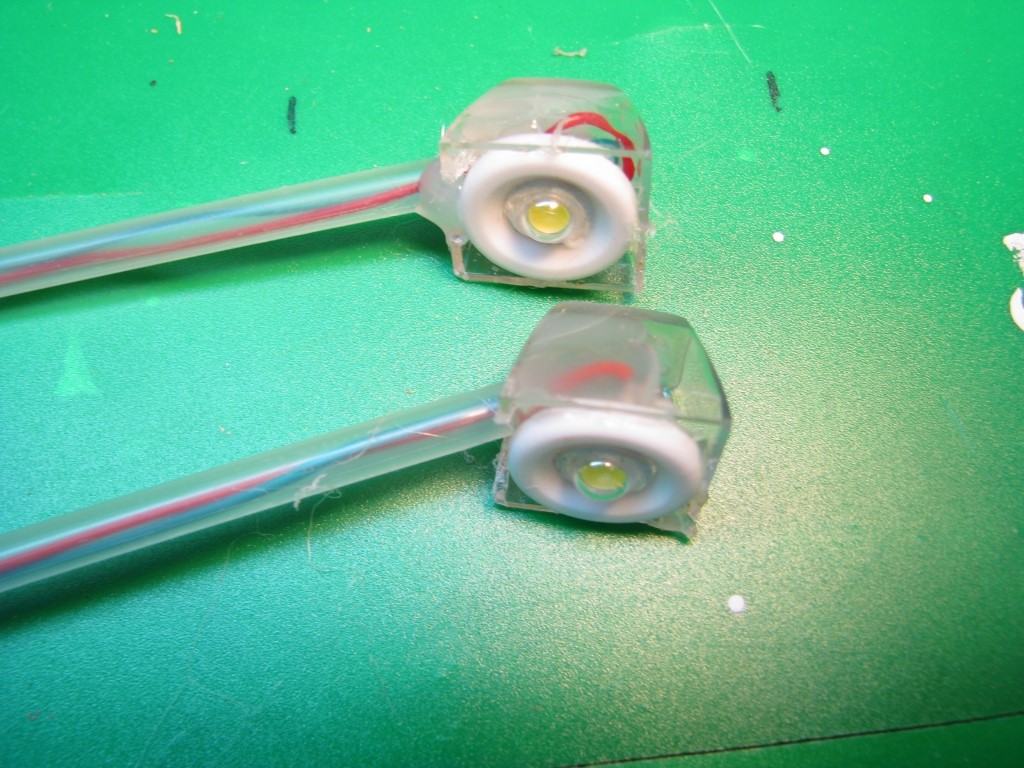
Since the real rink had floodlights as well, I made some model lights out of plastic tubes (from spray bottles), 2 computer keys and a high intensity LED.
3D Models
One player had printed very well except for one foot that didn’t print at all. I had to amputate the foot off another model and glue it on, with a metal pin inside. Just like real life!
Thursday, March 10, 2022
What took the longest was printing the models, because with 3D printing, orientation of the model is important since the printer can only lay down hot filament (like hot glue) onto a flat surface. That is, the printer cannot print a hand, for example, that is suspended in the air. If such a condition exists, the system will print supports for the flat surface. If that surface is 2 inches from the print bed, then the support has to be 2 inches tall. The supports are hollow to allow relatively easy removal after the job is done, the fewer supports the better since removal sometimes breaks thin areas that one wants to keep. Printing a box is real easy, printing a 3D hockey player is much more difficult which is why it took a month to get the proper prints. I printed the goalie about 10 times due to a problem with scale because he was crouched over whereas the others were standing. If I rescaled all 3 dimensions at once, the goalie was either too big or too thin.One player had printed very well except for one foot that didn’t print at all. I had to amputate the foot off another model and glue it on, with a metal pin inside. Just like real life!
Ice and Skates
Thursday, March 10, 2022
I struggled with how to put the models on the “ice”. My original thought was gluing them down but this would make big blobs of glue under the skates and would look terrible. Next idea was to use a magnetic base with magnets glued to the plastic skates. I purchased a ceramic notice board fridge magnet and cut it to size of the ice. The first model I glued magnets to did not stand up and again looked stupid with blobs of glue obscuring the skate blade. 
Thursday, March 10, 2022
Skates were very thin and would not support the model, so I cut the skates off after printing, and made skates out of steel wire. I bent the skate blade into shape, then heated one end at a time with a soldering iron to get the wire hot enough to push into the bottom of the skate shoe. This worked much better than I anticipated. The fridge magnet was very weak and even with the strong skate magnets acting as a go-between, the models only stood up weakly. Finally, what worked was a piece of steel plate that the magnet could really attract to, and also attract the metal skates. A bonus of course was that these magnets could be re-arranged in any position. I covered the steel plate with vinyl to represent the ice surface.
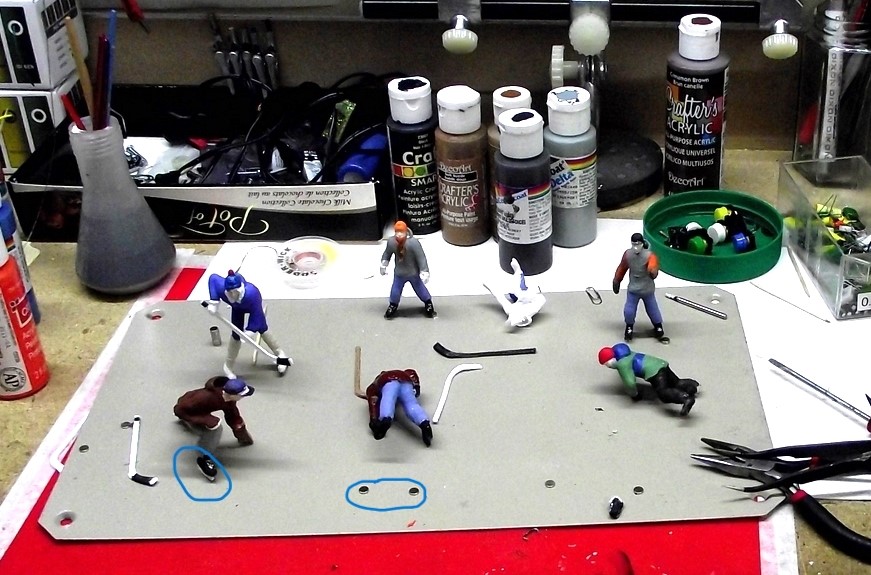
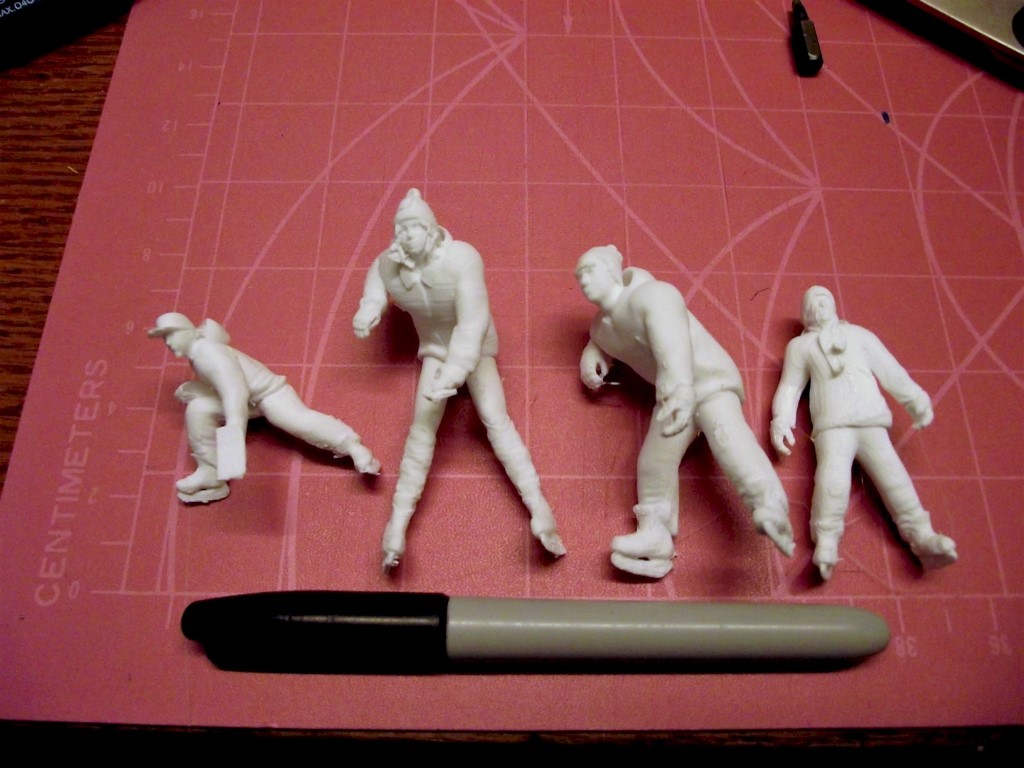
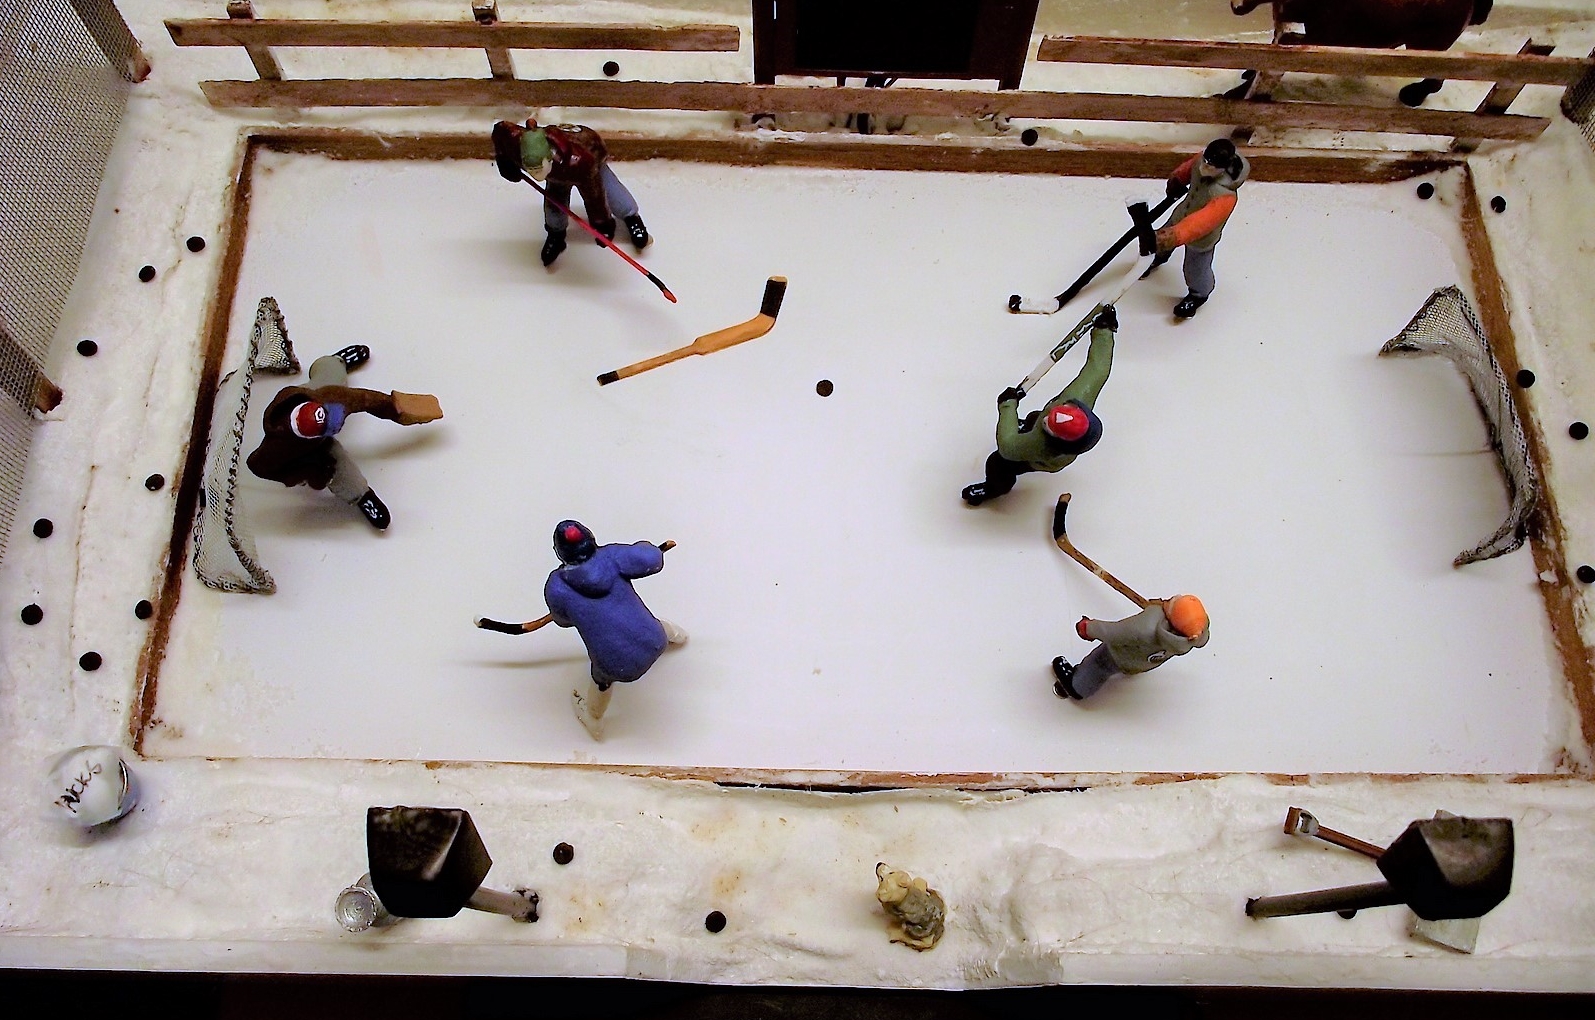
Photo at left shows the painted models, some standing on their skates (goalie, circled), held in place by tiny magnets. This beige metal piece was only used for setup here, not in final design, because it wasn't large enough.
Control Panel
The control panel is a handle from a big plastic storage box. It had a neat curve to it, so I wanted to use it to give it some pizzaz.
Thursday, March 10, 2022
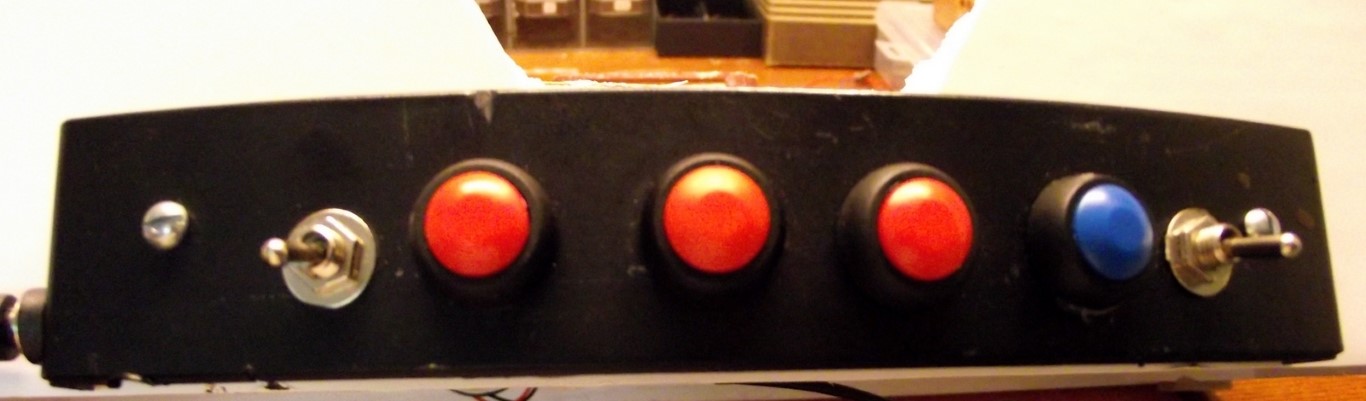
The diorama isn't static...there are sounds, visuals, video. The electronics is on the bottom of the display and control panel is on front.The control panel is a handle from a big plastic storage box. It had a neat curve to it, so I wanted to use it to give it some pizzaz.
Prince and Guy
Thursday, March 10, 2022
Prince was my daughter's horse and Guy was my son's dog. Yes, Guy for "Guy Lafleur", despite the dog being female. The horse was a commercial toy that I repainted the actual horse colors, rather than the orange that it was! I found a spaniel on 3D model supplier Thingiverse.com, printed and painted it. I also found the mini Stanley cup and snow shovel there.


Scoreboard
.JPG)
Saturday, March 12, 2022
Making the scoreboard was not only the main focus, and the reason for making this diorama, but also the most fun. While I was printing player models, I was bread-boarding the electronic parts required to make the scoreboard. Once I had the “Hello World” moment (meaning concept has been proven), I then wrote all the code in C++ with the usual hundreds of edits. My first GLCD (graphic liquid crystal display) was an inexpensive Chinese version that crapped out as I was using it. With that model I was using a separate module with SD card for bitmap displays. I upgraded to a more mainstream version made by Adafruit that worked much better and had a micro-SD card on the same board allowing me more space..JPG "Rink lights, flood lights mounted on drill stem (we use what we have...)")
.JPG "Closeup of scoreboard, all incandescent lights.")
.JPG "Control panel and PC board")
.JPG)
.JPG "Inside the scoreboard showing wiring and electronics")
.JPG "all incandescent 1 watt christmas light bulbs")
Here are photos of the rink and scoreboard I made in 1982:


 for MCU, sound, video")
.JPG "GLCD display during testing")

Sounds
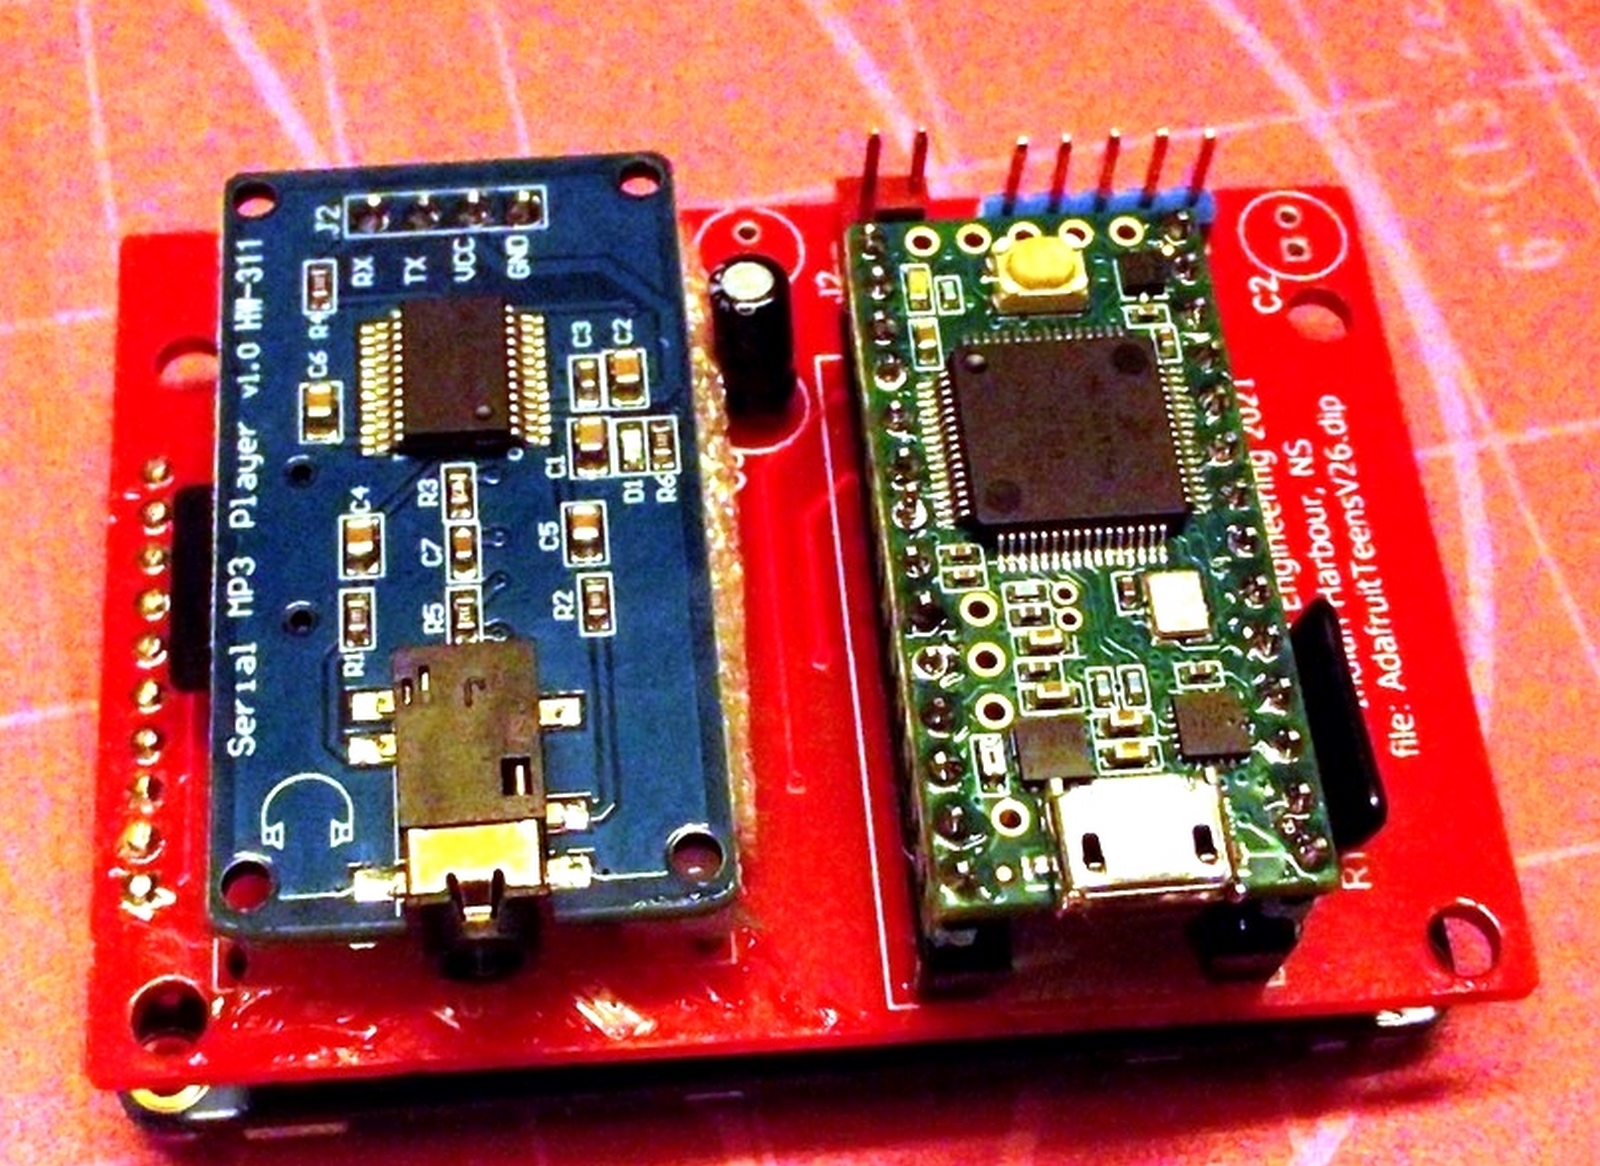
The sounds play from a module that records and plays MP3 sounds. I feed them through an amplifier to the speaker. Control is within the program.
Sunday, March 13, 2022
The project has 5 sounds that play through a loudspeaker on the underside (see further down the page). When power is first applied, the sound "Charge" plays at the 1:30 mark. At 1:00 a voice states, "1 minute to play in the game". If the OIlers score goes higher than the Canadiens, a nice female voice says, "Canadiens are never behind". Finally at time 0:00, there is the traditional "horn" sound.The sounds play from a module that records and plays MP3 sounds. I feed them through an amplifier to the speaker. Control is within the program.
Video and GLCD
Each image I added was compressed down to fit a 320x240 pixel display, and converted from JPG to bitmap (BMP). I used a free program called Gimp, for this purpose.
Sunday, March 13, 2022
The GLCD (graphic LCD) is a 320x240 pixel color display that displays the scoreboard, but because of an included SD card, can play video or slideshows. I downloaded a bunch of photos from my son's hockey life, beginning at age 6, onto the display. There is a 5 second display time between images, all controlled by the program. The beginning of the slideshow is controlled by a switch that is monitored by the program. To get out of the slideshow, another button resets back to the scoreboard. This is done with an interrupt to the Teensy's reset line.Each image I added was compressed down to fit a 320x240 pixel display, and converted from JPG to bitmap (BMP). I used a free program called Gimp, for this purpose.
MCU
Specs:
ARM Cortex-M4 at 72 MHz
256K Flash, 64K RAM, 2K EEPROM
USB device 12 Mbit/sec
34 digital input/output pins, 12 PWM output pins
21 analog input pins, 1 analog output pin, 12 capacitive sense pins
3 serial, 1 SPI, 2 I2C ports
1 I2S/TDM digital audio port
1 CAN bus
16 general purpose DMA channels
RTC for date/time
Tuesday, March 15, 2022
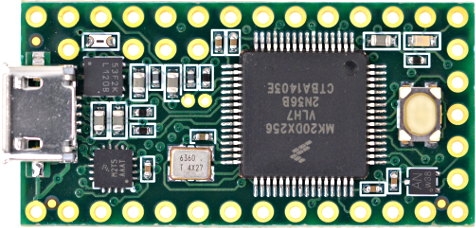
The MCU (micro-controller unit) I used was a Teensy 3.2, made by PJRC. An Arduino UNO (8 bit processor, 16MHz) worked fine for the scoreboard but I needed something faster and more memory to display bitmap images on the screen, so I used a Teensy 3.2. It is on the right in the photo.Specs:
ARM Cortex-M4 at 72 MHz
256K Flash, 64K RAM, 2K EEPROM
USB device 12 Mbit/sec
34 digital input/output pins, 12 PWM output pins
21 analog input pins, 1 analog output pin, 12 capacitive sense pins
3 serial, 1 SPI, 2 I2C ports
1 I2S/TDM digital audio port
1 CAN bus
16 general purpose DMA channels
RTC for date/time

This is the underside of the rink, showing the electronics
And the top side:
Copyright 2022 Queenidog - All Rights Reserved